

Run Jenkins in Docker with Docker Compose
Why use Jenkins I hear you ask? Well, for me the answers are simple: familiarity and the availability of an existing tested and officially supported Docker image. I have been using Jenkins for as long as I can remember.
The official image is here: https://hub.docker.com/r/jenkins/jenkins
After getting Jenkins up and running in the container we’ll look at creating a ‘Pipeline’ with the Docker Pipeline plugin. Jenkins supports lots of different ‘Items’, which used to be called ‘Jobs’, but Docker can be used to encapsulate build and test environments as well. In fact this is what BitBucket Pipelines and CircleCI also do.
To run Jenkins Pipeline we need a Jenkins installation with Docker installed. The easiest way to do this is to use the existing Jenkins Docker image from Docker Hub. Open a new command prompt and create a new directory for the development pipeline configuration and a sub directory called Jenkins with the following Dockerfile in it:
FROM jenkins/jenkins:lts
USER root
RUN apt-get update
RUN apt-get -y install \
apt-transport-https \
ca-certificates \
curl \
gnupg-agent \
software-properties-common
RUN curl -fsSL https://download.docker.com/linux/debian/gpg | apt-key add -
RUN add-apt-repository \
"deb [arch=amd64] https://download.docker.com/linux/debian \
$(lsb_release -cs) \
stable"
RUN apt-get update
RUN apt-get install -y docker-ce docker-ce-cli containerd.io
RUN service docker start
# drop back to the regular jenkins user - good practice
USER jenkins
You can see that our Dockerfile imports the existing Jenkins Docker image and then installs Docker for Linux. The Jenkins image, like most Docker images, is based on a Linux base image.
To get Docker Compose to build and run the image, we need a simple docker-compose.yml file in the root of the development pipeline directory with the details of the Jenkins service:
services:
jenkins:
container_name: jenkins
build: ./jenkins/
ports:
- "8080:8080"
- "5000:5000"
volumes:
- ~/.jenkins:/var/jenkins_home
- /var/run/docker.sock:/var/run/docker.sock
Note the build parameter which references a sub directory where the Jenkins Dockerfile should be located. Also note the volumes. We want the builds to persist even if the container does not, so create a .jenkins directory in your home directory:
Specifying it as a volume in docker-compse.yml tells the Docker image to write anything which Jenkins writes to /var/jenkins_home in the container to ~/.jenkins on the host - your local machine. If the development pipeline is running on a DigitalOcean droplet, DigitalOcean Volumes can be used to persist the volumes even after the droplet is torn down.
As well as running Jenkins in a Docker container we’ll also be doing our build and running our tests in a Docker container. Docker doesn’t generally like being run in a Docker container itself, so by specifying /var/run/docker.sock as a volume, the Jenkins container and the test container can be run on the same Docker instance.
To run Jenkins, simply bring it up with Docker compose:
(To stop it again just use ctrl+c)
Make sure the first time you note down the default password. It will appear in the log like this:
Please use the following password to proceed to installation:
<password>
This may also be found at: /var/jenkins_home/secrets/initialAdminPasswor
To configure Jenkins for the first time open a browser and navigate to:
http://localhost:8080
Then:
- Paste in the default password and click continue.
- Install the recommended plugins. This will take a few minutes. There is another plugin we need too which can be installed afterwards.
- Create the first admin user and click Save & Continue.
- Confirm the Jenkins url and click Save & Finish.
- Click Start Jenkins to start Jenkins.
You now have Jenkins up and running locally in a Docker container!
- To use Docker pipelines in Jenkins we need to install the plugin. To do this:
- Select Manage Jenkins from the left hand menu, followed by Manage Plugins.
- Select the ‘Available’ tab, search for ‘Docker Pipeline’ and select it,
- Click ‘Download now and install after restart’.
- On the next page put a tick in the ‘restart after download’ check box and wait for the installation and for Jenkins to restart. Then log in again.
Next we need to create the Docker Pipeline for the Messagelib solution.
- Select ‘New Item’ from the left hand menu, enter ‘Messagelib’ as the name, select ‘Pipeline’ and click ok.
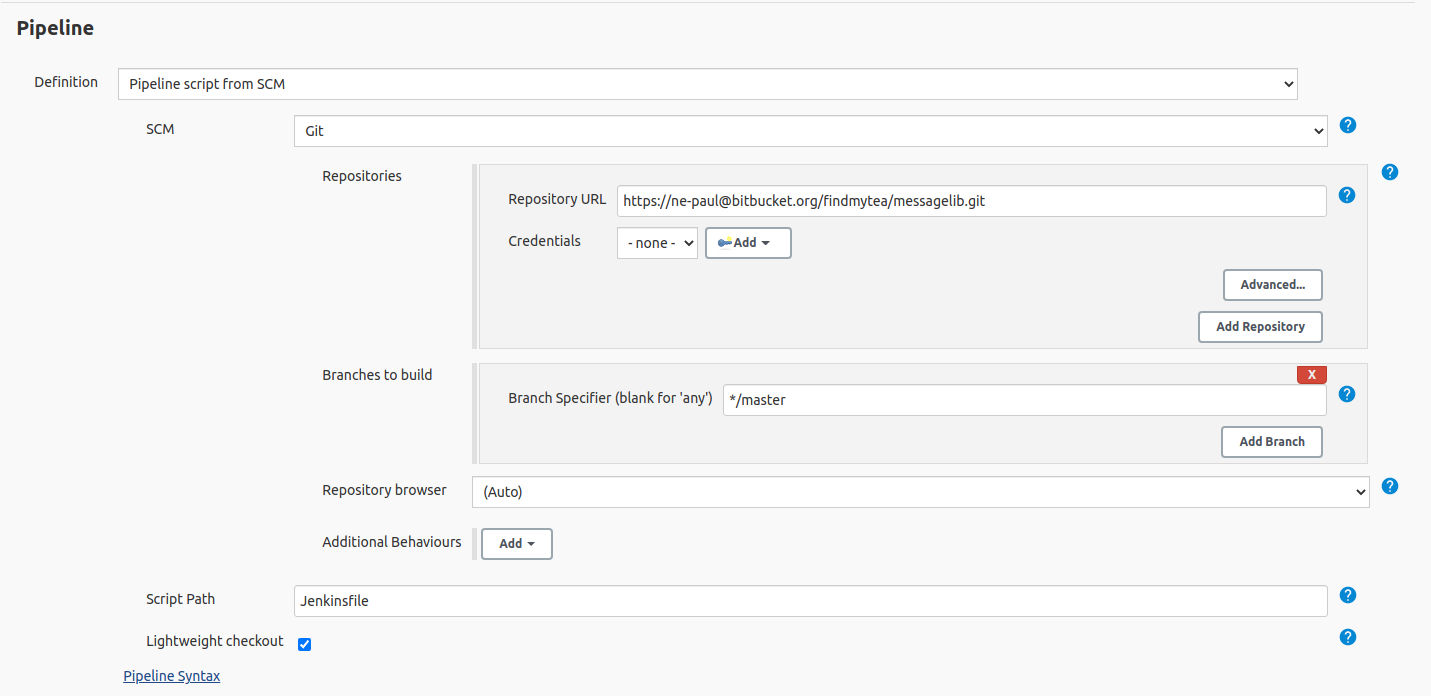
- Scroll to the ‘Pipeline’ section and select ‘Pipeline script from SCM’ from the ‘Definition’ dropdown. This is because we’re going to define our pipeline in a file in the Messagelib solution.
- From the ‘SCM’ dropdown, select ‘Git’ and enter the repository URL of the Messagelib solution.
- Then click Save.
Jenkins is now configured to run the Messagelib pipeline, but we need to tell it what to do by adding a text file called Jenkinsfile to the root of the Messagelib solution.
/* groovylint-disable CompileStatic, GStringExpressionWithinString, LineLength */
{
agent
{
docker { image 'pjgrenyer/dotnet-build-sonarscanner:latest' }
}
stages
{
stage('Build & Test')
{
steps
{
sh 'dotnet clean'
sh 'dotnet restore'
sh 'dotnet build'
}
}
}
}
This very simple Groovy script tells the Jenkins pipeline to get the latest ‘dotnet-build-sonarscanner’ Docker image and then use it to clean, restore and build the dotnet project. ‘dotnet-build-sonarscanner’ is a Docker image I built and pushed to Docker Hub using the following Dockerfile:
WORKDIR /
RUN apt update
RUN apt install -y default-jre
ARG dotnet_cli_home_arg=/tmp
ENV DOTNET_CLI_HOME=$dotnet_cli_home_arg
ENV DOTNET_CLI_TELEMETRY_OPTOUT=1
ENV PATH="${DOTNET_CLI_HOME}/.dotnet/tools:${PATH}"
ENV HOME=${DOTNET_CLI_HOME}
RUN dotnet tool install --global dotnet-sonarscanner
RUN chmod 777 -R ${dotnet_cli_home_arg}
This creates and configures a development environment for Dotnet Core and Sonar Scanner, which requires Java.
There is a way to use the Dockerfile directly, rather than getting it from Docker Hub, described here: https://www.jenkins.io/doc/book/pipeline/docker/
Once the Jenkins file is added to the project and committed, set the build off by clicking ‘Build now’ from the left hand menu of the MessageLib item. The first run will take a little while as the Docker image is pulled (or built). Future runs won’t have to do that and will be quicker. You should find that once the image is downloaded, the project is built quickly and Jenkins shows success.
Comments
Post a Comment